Showing posts with label fine motor. Show all posts

Sunday, May 12, 2013

Chalk outlines

Well this post is so self explanatory, it doesn't even need words ;-)


Pin It Now!

Monday, April 29, 2013

Spotty scones (sultana scones)

Most kids love cooking so here is a super simple scone recipe which the kids really enjoyed making (anything you can dip your hands in is usually a winner here)


Add flour, dextrose (or caster sugar), salt and butter to a big bowl and mix using your hands until it goes all crumbly


Add sultanas then add milk and slowly add water while stirring with a knife (we did not use all of the water)


Roll out on a floured bench and cut out rounds with a cookie cutter.


Place on a lined tray and brush with milk.


Bake in the oven for approx 10mins at 200 degrees


Smother in butter and EAT!


YUM!

Spotty Scones 
(recipe from Cooking With Kids by Susan Davies)
2 1/2 cups self raising flour
1 Tbsp caster sugar (we used dextrose)
Pinch salt
30g butter
1/2 cup sultanas
3/4 cup milk
1/2 cup water (approx - we didn't use all of it)

1. Preheat oven to 220c. Line a tray with baking paper.
2. In a large bowl, combine flour with sugar and salt. Rub in butter with finger tips till mixture resembles breadcrumbs. Add sultanas.
3. Use a knife to stir through milk and enough water to form a soft dough.
4. Turn dough onto a floured surface and press out to 2cm thickness. Cut into 5cm rounds. Knead scraps together and repeat. Place rounds onto prepared tray, brush with a little milk and bake for 12-15mins till scones are golden. Cool on a wire rack.
Pin It Now!

Tuesday, April 16, 2013

Colour matching

Here is an easy to make colour matching game using items you're likely to have laying around the house.

All you need is some coloured paper, coloured textas, an egg carton, paddle pop sticks (coloured work well, but they don't have to be!), glue (I used super glue) and I also used a laminator.


First draw flowers on your coloured paper:


Then colour in the bottom of an egg carton (obviously using the same coloured textas as the paper you have) then use a knife to cut slits in the middle of each colour - not too big otherwise the paddle pop stick wont stay up!


Cut out the flowers, then laminate (you don't have to laminate them if you don't have a laminator, but it will prolong the life of your flowers!)


Use super glue to attach the flowers to the paddle pop sticks (I used super glue - I find craft glue and kids glue don't hold strong enough for rough little hands!)


Match the flowers and to the coloured patches on the egg carton:


Ladybug loved trying to match the colours. She would hold a flower up to each colour and say "Match? Noooo", "Match? Noooo" until she found the correct colours and say "Match? Yes!"


Sometimes she needed some help getting the paddle pop stick into the hole but good practise for her fine motor skills:


She also practised naming her colours, apparently this one is "Yellow green"


And she also practised her counting:

Pin It Now!

Friday, March 8, 2013

Felt board counting chart

Ladybug has been surprising me with her counting lately and now I find myself counting out everything! I wanted to make her a chart to exemplify each number to help her understand what each number 'means'

At Christmas we made a felt tree to stick on the wall. Ladybug loved taking off all the felt decorations and re-decorating it over and over again. I love how felt sticks to felt! ...and what a perfect way to make a counting chart for her!


You will need some felt squares in various colours (atleast 6 colours), scissors, glue and a pencil.


Use one colour as the backing and then cut out the numbers 1 - 10 using each of the remaining colours.


I used a hot glue gun to secure the numbers in the right place (I though about having these removable too, but decided this could confuse things)


Then cut out the coloured dots accordingly. I decided to match the colour of the dots to the numbers so that Ladybug would be able to identify which dots go with which number.


I used blutak to hang it on the wall and let Ladybug explore her new chart. She loves brushing them all off and then we sit and count all the dots back on matching the colours with their right number.


Pin It Now!

Tuesday, February 26, 2013

30 Screen free rainy day activities

We've had a lot of rain here lately and apparently more to come. Try out some of our screen free rainy day activities and hopefully your time indoors will be a bit brighter.


- Put some music on and DANCE
- Blow bubbles
- Play chasee
- Build a tower (and knock it down)
- Use furniture to make an obstacle course (chairs to climb under, cushions to climb over, baskets to dodge around, etc)
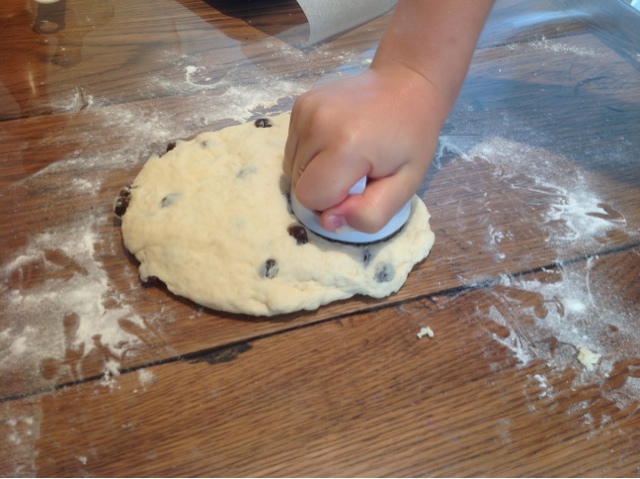
- Cook together
- Have a tea party with stuffed animals/dolls
- Play peek a boo
- Make a cubby house with bed sheets (and have lunch in there)
- Play toss with a basket/bucket and beanbags or soft toys
- Play the drums using pots and pans and spoons
- Read books together
- Have a picnic in the lounge room
- Sing songs together
- Play limbo with toilet paper
- Use spray bottles and cloths to clean the windows
- Colour in and draw together
- Play bowling with plastic cups
- Act out (or draw) your child's favourite story
- Play dress ups
- Make a balance beam on the ground with masking tape
- Give old wooden blocks a make over by re-painting them with bright colours and patterns
- Put on raincoats and gumboots, get an umbrella and go for a walk in the rain (if it's not too windy and cold!)
- Have a puppet show (use stuffed toys if you don't have puppets)
- Go swimming in the bath tub
- Stickers!
- Play board games (yes, they still exist!)
- Teach your kids how to play card games (I love Skip Bo and Uno)
- Give all the cars a car wash in the bath (or bath the dollies)
- Make up silly rhymes and stories


Pin It Now!

Friday, January 18, 2013

Freeform Pretzels

This activity was so easy (and yummy!) and the kids loved the process as well as the result.

We made up a basic pretzel dough (recipe below)


Then on a floured table top they kneaded and rolled the dough into thin sausages


Then twisted and formed it into any shape they liked.


We ended up with letters, windows, teacups, hearts, balls and even a Nerf gun!

The kids loved 'breaking the rules' of the normal recipe which instructs you to shape the dough into a generic pretzel twist.

After all the dough was used up we placed the dough on some baking paper on oven trays. Brushed them with the beaten egg and sprinkled them with some Himilayan rock salt.


They didn't take long in the oven (approx 12 mins at 180) and even better, they didn't take long to cool down. Perfect cause they smelt and tasted sooo yummy! We had them for afternoon tea with some cold slices of watermelon. Even Ladybug demolished all of hers.


We'll definitely repeat this activity but next time might try some variations using whole meal flour or adding chia seeds to the mix.


Pretzel dough:
1 pkg yeast
1 1/2 cups warm water
1 tsp salt
1 tbs sugar (we used dextrose)
4 cups flour
1 egg, beaten
Rock salt (we used Himalayan)

Pour the warm water into a bowl and sprinkle on the yeast and stir.
Add remaining ingredients and mix until dough forms.
We baked it in the oven for about 12 minutes at 180 degrees.
 
Pin It Now!